GFI WebMonitor Installation: Gateway / Proxy Mode, Upgrades, Supported O/S & Architectures (32/64bit)
WebMonitor is an awarded gateway monitoring and internet access control solution designed to help organizations deal with user internet traffic, monitor and control bandwidth consumption, protect computers from internet malware/viruses and other internet-based threats plus much more. GFI WebMonitor supports two different installation modes: Gateway mode and Simple Proxy mode. We’ll be looking into each mode and help administrators and engineers understand which is best, along with the prerequisites and caveats of each mode.
Proxy vs Gateway Mode
Proxy mode, also named Simple Proxy mode is the simplest way to install GFI WebMonitor. You can deploy this on any computer that has access to the internet. In Simple Proxy mode, all client web-browser traffic (HTTP/HTTPS) is directed through GFI WebMonitor. To enable this type of setup, you will need an internet facing router that can forward traffic and block ports.
With GFI WebMonitor functioning in Simple Proxy mode, each client machine must also be configured to use the server as a web proxy for HTTP and HTTPS protocols. GFI WebMonitor comes with built-in Web Proxy Auto-Discovery (WPAD) server functionality that makes the process easy - simply enable automatic discovery of proxy server for each of your client machines and they should automatically find and use WebMonitor as a proxy. In case of a domain environment, it is best to regulate this setting using a Group Policy Object (GPO).
When WebMonitor is configured to function in Internet Gateway mode, all inbound and outbound client traffic will pass through GFI WebMonitor, irrespective of whether the traffic is HTTP or non-HTTP. With Internet Gateway mode, the client browser does not need to point to any specific proxy – all that’s required is to enable the Transparent Proxy function in GFI WebMonitor.
Supported OS & Architectures
Whether functioning as a gateway or a web proxy, GFI WebMonitor processes all web traffic. For a smooth operation that amounts to using a server architecture capable of handling all the requests every day. When the environment is small (10-20 nodes), for instance, a 2 GHz processor and 4 GB RAM minimum with a 32-bit Windows operating system architecture will suffice.
Larger environments, such as those running the Windows Server operating system on a minimum of 8 GB RAM and multi-core CPU will require the 64-bit architecture. GFI WebMonitor works with both 32- as well as 64-bit Windows operating system architectures starting from Windows 2003 and Windows Vista.
Installation & Upgrading
When installing for the first time, GFI WebMonitor starts by detecting its prerequisites. If the business is already using GFI WebMonitor, the process determines the prerequisites according to the older product instance. If the installation kit encounters an older instance, it imports the previous settings and redeploys them after completing the installation.
Whether installing for the first time or upgrading an older installation, the installation kit looks for any setup prerequisites necessary and installs them automatically. However, some prerequisites may require user interaction and these will come up as separate installation processes with their own user interfaces.
Installing GFI WebMonitor
As with all GFI products, installation is a very easy follow-the-bouncing-ball process. Once the download of GFI WebMonitor is complete, execute the installer using an account with administrative privileges.
If WebMonitor has been recently downloaded, you can safely skip the newer build check. When ready, click Next to proceed:
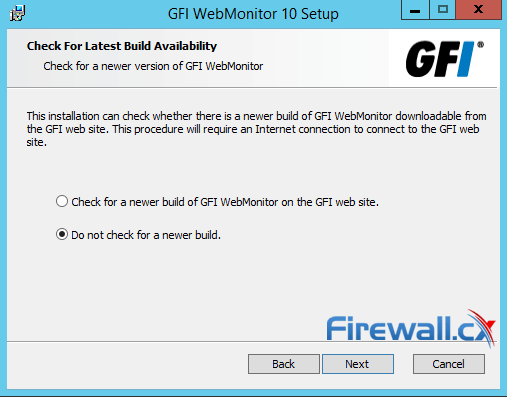
Figure 1. Optional check for a new WebMonitor edition during installation
You will need to fill in the username and/or the IP address that will have administrative access to the web-interface of GFI WebMonitor, then click Next to select the folder to install GFI WebMonitor and finally start the installation process:
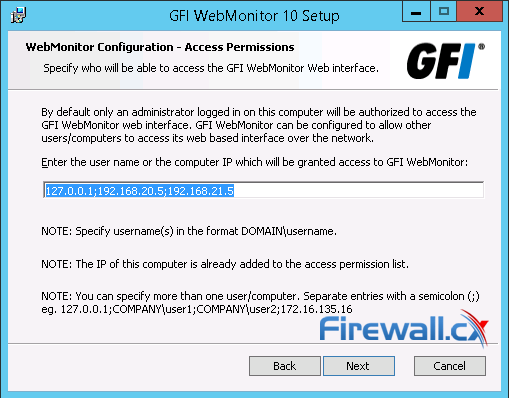
Figure 2. Selecting Host and Username that are allowed to access the WebMonitor Administration interface.
Once the installation process is complete, click Finish to finalize the setup and leave the Open Management Console checked:
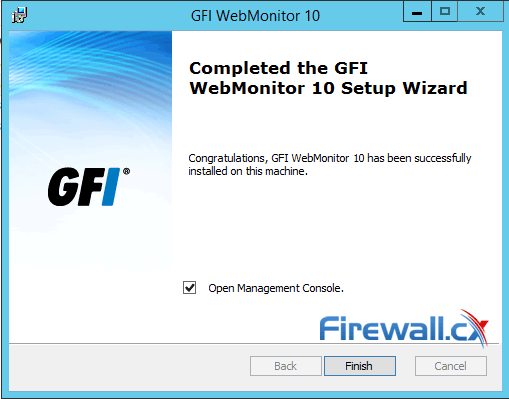
Figure 3. Installation complete – Open Management Console
After this, the welcome screen of the GFI WebMonitor Configuration Wizard appears. This will allow you to configure the server to operate in Simple Proxy Mode or Gateway Mode. At this point, it is recommended you enable JavaScript in Internet Explorer or the web browser of your choice before proceeding further:
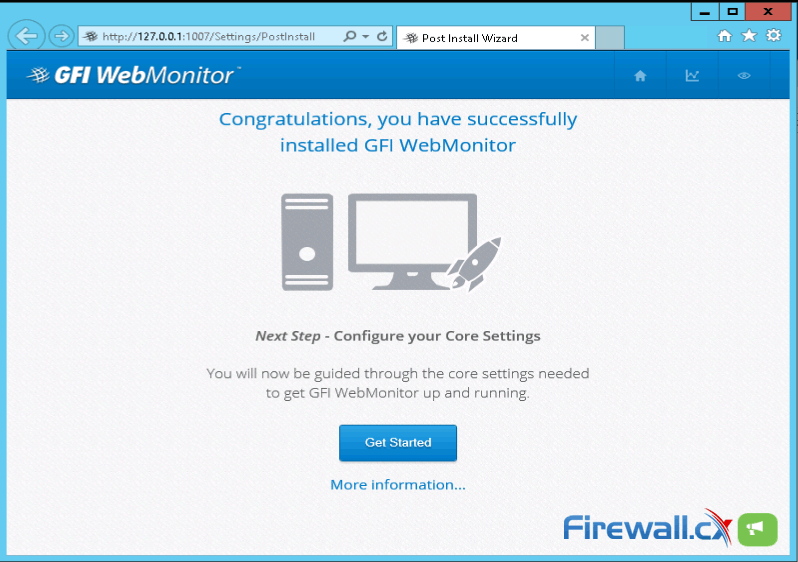 Figure 4. The welcome screen once WebMonitor installation has completed
After clicking on Get Started to proceed, we need to select which of the two modes GFI WebMonitor will be using. We selected Gateway mode to ensure we get the most out of the product as all internet traffic will flow through our server and provide us with greater granularity & control:
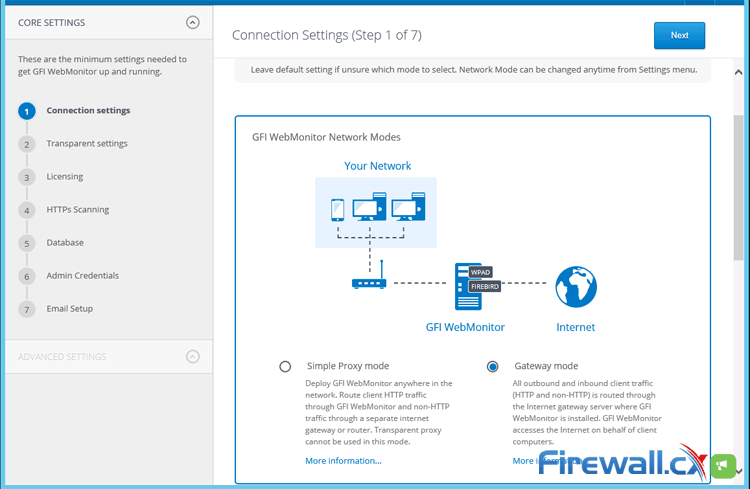 Figure 5. Selecting between Simple Proxy and Gateway mode
The Transparent Proxy can be enabled at this stage, allowing web browser clients to automatically configure themselves using the WPAD protocol. WebMonitor shows a simple network diagram to help understand how network traffic will flow to and from the internet:
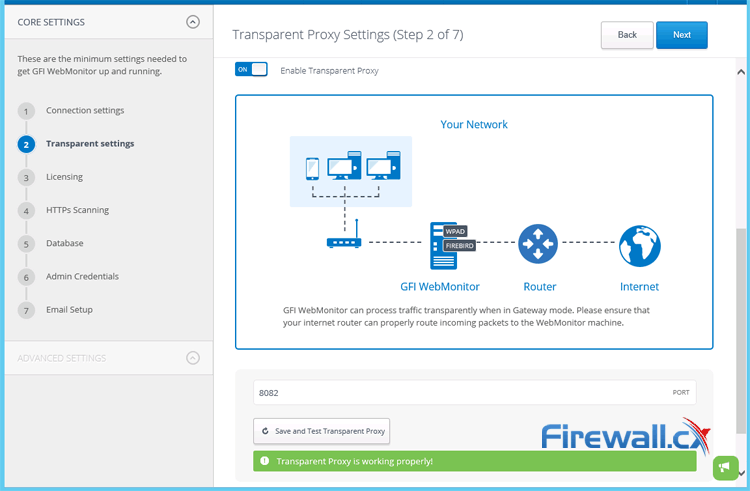 Figure 6. Internet traffic flow in WebMonitor’s Gateway Mode
Administrators can select the port at which the Transparent Proxy will function and then click Save and Test Transparent Proxy. GFI WebMonitor will confirm Transparent Proxy is working properly.
Now, click Next to see your trial license key or enter a new license key. Click on Next to enable HTTPS scanning.
HTTPS Scanning gives you visibility into secure surfing sessions that can threaten the network's security. Malicious content may be included in sites visited or files downloaded over HTTPS. The HTTPS filtering mechanism within GFI WebMonitor enables you to scan this traffic. There are two ways to configure HTTPS Proxy Scanning Settings, via the integrated HTTPS Scanning Wizard or manually.
Thanks to GFI WebMonitor’s flexibility, administrators can add any HTTPS site to the HTTPS scanning exclusion list so that it bypasses inspection.
If HTTPS Scanning is disabled, GFI WebMonitor enables users to browse HTTPS websites without decrypting and inspecting their contents.
When ready, click Next again and provide the full path of the database. Click Next again to enter and validate the Admin username and password. Then, click Next to restart the services. You can now enter your email details and click Finish to end the installation.
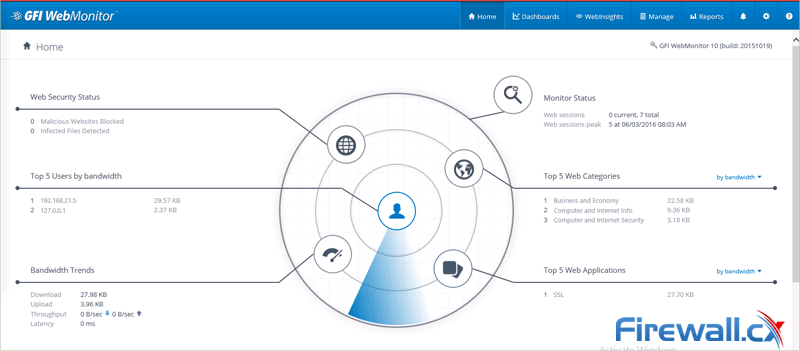 Figure 7. GFI WebMonitor’s main control panel
Once the installation and initial configuration of GFI WebMonitor is complete, the system will begin gathering useful information on our users’ internet usage.
In this article we examined WebMonitor Simple Proxy and Gateway installation mode and saw the benefits of each method. We proceeded with the Gateway mode to provide us with greater flexibility, granularity and reporting of our users’ internet usage. The next articles will continue covering in-depth functionality and reporting of GFI’s WebMonitor.
Wi-Fi Key Generator
Follow Firewall.cx
Cisco Password Crack
Decrypt Cisco Type-7 Passwords on the fly!


