Whether you’re new to Cisco Nexus switches or have been working with them for years this article will show how to get around the Nexus NX-OS using smart CLI commands and parameters, create your own commands and more. Learn how to filter show command outputs, efficiently use include | begin | exclude search operators, Turn pagination on/off, redirect output to files, run multiple commands in one CLI line, capture specific keywords from show command output, create custom CLI commands using alias, execute scripts, introduction of Python environment in the Nexus NX-OS, executing Python scripts and much more!
By the end of this article we’ll agree there’s no doubt the Cisco NX-OS has several interesting commands and powerful scripting capabilities that can improve and facilitate the day-to-day administration of CISCO Nexus network devices.
While basic knowledge on the Cisco NX-OS, Linux and Python scripting is recommended, it is not mandatory in order to understand the topics covered.
Key Topics:
- NX-OS Command Output Filtering – Search Operators
- Filtering Output From The ‘Show’ Command – ‘Show | grep’
- Turning Off Pagination for Lengthy ‘Show’ Command Outputs - ‘Show | no-more’ Parameter
- Searching & Filtering Output from ‘Show’ Command
- Display Last Lines from the ‘Show’ Command Output – ‘Show | last ’
- Redirecting ‘Show’ Command Output To File and Include Timestamps. ‘Show running-config > backupcfg.$(TIMESTAMP) ‘
- Combining Multiple Search Strings – ‘| Include’ Parameter
- Scripting in Nexus NX-OS – Executing Multiple Commands within a File
- Introducing Python in the Nexus NX-OS – Uploading and Executing Python Scripts
- Nexus NX-OS Hints & Tips
- Nexus NX-OS Tip No.5 – Executing Multiple Commands in One Line
- Nexus NX-OS Tip No.4 – Tracking Recent User Configuration Changes
- Nexus NX-OS Tip No.3 – Creating Your Own NX-OS Alias Commands
- Nexus NX-OS Tip No.2 – Quickly Viewing and Executing Past Commands
- Nexus NX-OS Tip No.1 – Comparing Differences in Running & Startup Configuration
Additional related articles:
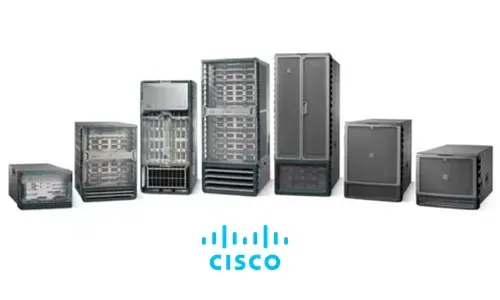
- Introduction to Cisco Nexus Switches – Nexus Product Family. Differences Between Nexus NX-OS & Catalyst IOS. Comparing High-End Nexus & Catalyst Switches
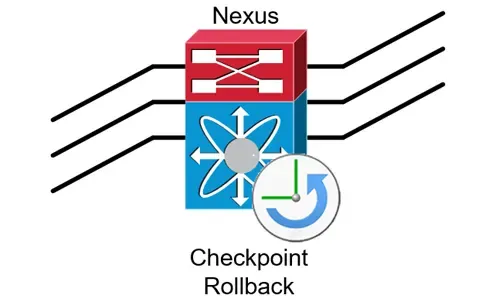
- Complete Guide to Nexus Checkpoint & Rollback Feature. Fast Recovery from Nexus Misconfiguration. Nexus 9000, 7000, 5000, 3000
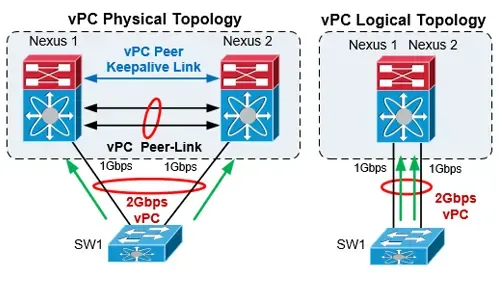
- The Complete Cisco Nexus vPC Guide. Features & Advantages, Design Guidelines, Configuration, Failure Scenarios, Troubleshooting, VSS vs vPC
NX-OS Command Output Filtering – Search Operators
 The output from NX-OS show commands can be lengthy and that makes it difficult to find the information we are looking for. The Cisco NX-OS software provides the means to search and filter the output to assist in locating the information we are after.
Experienced Cisco users will surely be familiar with the IOS (Catalyst) include | begin | exclude search operators which are also offered in the Nexus NX-OS (see below). The NX-OS offers additional searching and filtering options, which follow a pipe character (|) at the end of the show command. This provides amazing flexibility and helps make administration of any Nexus device a great experience. The most “Linux-like” useful options are displayed below:
N5k-UP# show interface brief | ?
<…>
diff Show difference between current and previous invocation (creates temp files: remove them with 'diff-clean' command and dont use it on commands with big outputs, like 'show tech'!)
egrep Egrep - print lines matching a pattern
grep Grep - print lines matching a pattern
less Filter for paging
no-more Turn-off pagination for command output
section Show lines that include the pattern as well as the subsequent lines that are more indented than matching line
sort Stream Sorter
source Run a script (python, tcl,...) from bootflash:scripts
vsh The shell that understands cli command
wc Count words, lines, characters
xml Output in xml format (according to .xsd definitions)
begin Begin with the line that matches
count Count number of lines
exclude Exclude lines that match
include Include lines that match
Filtering Output From The ‘Show’ Command - ‘Show <command> | grep’ & ‘Show <command>egrep’ Parameters
The grep & egrep parameters can be used to filter the show command output for easier to read results.
The example below shows how to filter the show running-config output by specifying the number of lines to display before and after a matched line. The matching variable in our example is the keyword Firewall:
N5k-UP# show running-config | grep prev 1 next 2 Firewall
interface Ethernet1/1
description Firewall – LAN
interface Ethernet1/2
--
interface Ethernet1/4
description Firewall - WAN
interface Ethernet1/5
You can use the less operator to display the contents of the show command output in one page at a time. There are various command options at the ‘:’ prompt. To display all support less command options you enter ‘h’ at the ‘:’ prompt.
An interesting output and useful option is using the show log | less command which Unix/Linux users will welcome as it has the same effect as the tail –f <filename> Linux command. This command will display the last entries of the system’s log and automatically update the display with any new content/log entries inserted. Engineers and admins can now easily troubleshoot problems while continually keeping an eye on the Nexus syslog without the need to use the show log command every minute to get any new updates written to the system’s log:
N5k-UP# show log | less
:F
<…>
2023 May 15 11:59:20 N5k-UP %EEM_ACTION-2-CRIT: SLA-PYTHON-SCRIPT-FOR-8.8.8.8/32-EXECUTED
2023 May 15 11:59:20 N5k-UP %VSHD-5-VSHD_SYSLOG_CONFIG_I: Configured from vty by admin on vsh.1115
Waiting for data... (interrupt to abort)
To exit this mode simply type Ctrl-C and then q to abort.
Another useful operator is the sort parameter used to filter the show command output in an order as shown below with the Ethernet interfaces. Keep in mind that the command will sort the output based on the character order which means any interface with an Eth1 will show first, then Eth2 and so on.
N5k-UP# show interface brief | sort
Eth1/1 1 eth access down SFP validation failed 10G(D) --
Eth1/10 1 eth access down SFP not inserted 10G(D) --
Eth1/11 1 eth access down SFP not inserted 10G(D) --
Eth1/12 1 eth access down SFP not inserted 10G(D) –
<…>
Turning Off Pagination For Lengthy ‘Show’ Command Outputs. ‘Show <option> | no-more’ Parameter
The | no-more parameter is particularly useful when there is a need to display all output without stopping at the end of the page. A good example is to show the running-configuration or obtain the output of any command in one hit. By default, the Nexus OS will pause the output once it hits the end of the user’s terminal page. This feature can be easily bypassed by appending the |no-more parameter at the end of the command:
N5k-UP# show interface brief | no-more
Searching & Filtering Output from ‘Show’ Command: ‘Show <option>’–More-
You can search and filter output from the --More– prompt displayed in the show command output. When the --More— prompt appears (as shown below), simply type h to view all possible options. An interesting feature is to filter the output by typing / (forward-slash) and then to search for the pattern that you are looking for:
N5k-UP# show running-config
!Command: show running-config
!Time: Mon May 15 12:30:09 2023
<…>
--More—
<…>
/<regular expression>
Displaying Last Lines From The ‘Show’ Command Output – ‘Show <option> | last ’
When working with lengthy outputs from commands such as show logging it’s often desirable to display the last lines of the command output. The show <option> | last command will display the last 10 lines by default. Appending a number after the keyword last will adjust the lines displayed. The example below shows the last 5 log entries in our Nexus system:
N5k-UP# show logging | last 5
2023 May 15 12:34:30 N5k-UP %VSHD-5-VSHD_SYSLOG_CONFIG_I: Configured from vty by admin on vsh.5669
2023 May 15 12:34:40 N5k-UP %EEM_ACTION-2-CRIT: SLA-PYTHON-SCRIPT-FOR-8.8.8.8/32-EXECUTED
2023 May 15 12:34:40 N5k-UP %VSHD-5-VSHD_SYSLOG_CONFIG_I: Configured from vty by admin on vsh.5691
2023 May 15 12:34:50 N5k-UP %EEM_ACTION-2-CRIT: SLA-PYTHON-SCRIPT-FOR-8.8.8.8/32-EXECUTED
2023 May 15 12:34:50 N5k-UP %VSHD-5-VSHD_SYSLOG_CONFIG_I: Configured from vty by admin on vsh.5709
Redirecting ‘Show Command’ Output to File with or without Timestamp. ‘Show running-config>backupcfg.$(TIMESTAMP) ‘
The ability to redirect the output of a command to a file is a feature most Linux users/administrators will welcome. Capturing lengthy outputs from commands such as show tech-support can become quite challenging as these can sometime be over 10,000 lines. Redirecting the output of a command to a file is a very simple process making it easy to execute even by less experienced users.
The command below shows how to redirect the output of the show running-config command to a file on the system’s flash:
N5k-UP# show running-config > backupcfg
N5k-UP# dir | include backup
4352 May 15 13:30:00 2023 backupcfg
When adding the System-Defined Timestamp Variable into the command line the Nexus OS will automatically append the time and date to the filename making it easier to store and track files. The next example redirects the show running-config output to a file that includes the system’s timestamp:
N5k-UP# show running-config> backupcfg.$(TIMESTAMP)
N5k-UP# dir | include backup
4352 May 15 13:30:00 2023 backupcfg
4352 May 15 13:46:17 2023 backupcfg.2023-05-15-13.46.17
Combining Multiple Search Strings – ‘| Include’ Parameter
Sometimes, it is necessary to combine search strings from the show command to filter the output and quickly obtain the information we need. The | include parameter is frequently used to filter the output and display lines containing specific keywords.
The next command will show the configured descriptions from all interfaces and include the interface utilization which is captured by the rate keyword:
N5k-UP# show interface | include description | rate
PH_NEXUS_7000# show interface | incdescription|rate
1 minute input rate 0 bits/sec, 0 packets/sec
1 minute output rate 0 bits/sec, 0 packets/sec
30 seconds input rate 56 bits/sec, 0 packets/sec
30 seconds output rate 896 bits/sec, 1 packets/sec
input rate 56 bps, 0 pps; output rate 896 bps, 1 pps
300 seconds input rate 112 bits/sec, 0 packets/sec
300 seconds output rate 488 bits/sec, 1 packets/sec
input rate 112 bps, 0 pps; output rate 488 bps, 1 pps
30 seconds input rate 120 bits/sec, 0 packets/sec
30 seconds output rate 1072 bits/sec, 1 packets/sec
..<output omitted>
All search strings are case sensitive and there is no space between the last pipe and keywords (description|rate).
Next example command is equivalent to the OR option for a filter.
N5k-UP# show run | include 'interface Vlan|ip address'
iptacacs source-interface Vlan1
source-interface Vlan1
ip address 10.1.1.101/24
interface Vlan1
ip address 192.168.250.247/24
interface Vlan4
ip address 192.168.4.247/24
interface Vlan7
ip address 172.20.199.247/24
interface Vlan11
interface Vlan25
ip address 192.168.25.247/24
interface Vlan26
ip address 172.26.1.251/24
interface Vlan27
ip address 172.27.1.250/24
interface Vlan60
interface Vlan100
ip address 172.20.100.247/24
interface Vlan105
ip address 172.20.105.247/24
interface Vlan109
ip address 172.20.109.247/24
interface Vlan110
ip address 172.20.110.247/24
Finally the last example is used when there is a need to use more than one word to filter specific keywords/patterns. The search strings should be included between apostrophes as shown below:
N5k-UP# show running-config | include 'ip route'
ip route 0.0.0.0/0 192.168.245.245
ip route 0.0.0.0/0 192.168.231.4
ip route 0.0.0.0/0 172.26.1.250
ip route 0.0.0.0/0 10.1.1.1
Scripting in NX-OS – Executing Multiple Commands within a File
Automating time-consuming tasks such as configuring multiple interfaces or changing large portions of a configuration is easily achieved thanks to the flexibility the NX-OS provides.
Here are a few examples where automated scripts can be used to help speed up troubleshooting or even resolve problems:
- Temporarily change the running configuration, obtain debugs and then roll back the change
- Have a series of commands ready to be executed when specific events occur e.g. link failure or switch becomes unresponsive
- Execute commands on the Nexus after the switch is deployed at a remote location
- Periodically obtain information from the Nexus switch using show commands.
The possibilities and combinations are really limitless.
Unfortunately the script containing the commands cannot be created within NX-OS. The script needs to be created on a workstation using a standard text editor and then uploaded to the Nexus switch bootflash.
Uploading the file to the Nexus bootflash is achieved using the copy tftp: bootflash: command. This assumes there is already a tftp server configured, operating and serving the script:
N5k-UP# copy tftp: bootflash:
Enter source filename: nexus-script.txt
Enter vrf (If no input, current vrf 'default' is considered): management
Enter hostname for the tftp server: 10.10.8.176
Trying to connect to tftp server......
Connection to Server Established.
TFTP get operation was successful
Copy complete, now saving to disk (please wait)...
N5k-UP# dir | include nexus
179 May 15 00:03:12 2023 nexus-script.txt
N5k-UP#
The script’s content can be viewed using the show file command as displayed below:
N5k-UP# show file bootflash:///nexus-script.txt
Configure terminal
interface Ethernet1/6
description *** TEST 1 ***
no shutdown
interface Ethernet1/7
description *** TEST 2 ***
no shutdown
interface Ethernet1/8
description *** TEST 3 ***
no shutdown
end
As we can see, the script contains commands that will configure the description on 3 Ethernet interfaces and place them in an administratively up status (no shutdown). Currently these interfaces do not have any configuration:
N5k-UP# show run interface
!Command: show running-config interface
!Time: Mon May 15 00:00:41 2023
version 7.0(2)N1(1)
<…>
interface Ethernet1/6
interface Ethernet1/7
interface Ethernet1/8
Executing our script can be easily done using the run-script command. The run-script command is used to execute the commands specified in a file:
N5k-UP# run-script bootflash:///nexus-script.txt
`configure terminal
`interface Ethernet1/6
`description *** TEST 1 ***
`no shutdown
`interface Ethernet1/7
`description *** TEST 2 ***
`no shutdown
`interface Ethernet1/8
`description *** TEST 3 ***
`no shutdown
`end
Once the script is executed we can check the running-configuration and verify interfaces have been successfully configured:
N5k-UP# show running-config interface
!Command: show running-config interface
!Time: Mon May 15 00:04:04 2023
version 7.0(2)N1(1)
<output omitted>..
interface Ethernet1/6
description *** TEST 1 ***
no shutdown
interface Ethernet1/7
description *** TEST 2 ***
no shutdown
interface Ethernet1/8
description *** TEST 3 ***
no shutdown
Another option is to use the vsh command and run commands directly. The vsh stands for virtual shell and is mainly used to run NX-OS cli commands from Bash Shell however, we can still run the same script but this time by taking advantage of the vsh command.
The vsh command is executed on a clean configuration and the interface descriptions are successfully configured:
N5k-UP# show file script-description2.txt | vsh
N5k-UP# show run interface
!Command: show running-config interface
!Time: Mon May 15 10:49:16 2023
<…>
interface Ethernet1/6
description *** TEST 1 ***
interface Ethernet1/7
description *** TEST 2 ***
interface Ethernet1/8
description *** TEST 3 ***
There is also the option to execute commands directly as illustrated in the following example.
N5k-UP# echo "hostname TEST-VSH" | vsh
TEST-VSH#
Introducing Python in the Nexus NX-OS – Uploading and Executing Python Scripts
 Nexus switches offer powerful scripting capabilities since integrating Python into NX-OS and can simplify network operations through the ability to run Python scripts directly on the switch. Python is a powerful programming language with a simple approach to object-oriented programming. The Cisco Nexus 5000 series switches with Releases 5.2(1)N1(1) and later and the Cisco Nexus 6000 series switches with Releases 6.0(2)N1(1) and later, support all the features available in Python v2.7.2. The Cisco Nexus 7000 series also support Python v2.7.2 and the Cisco Nexus 9000 Series devices support Python v2.7.5. The python scripts can be used to execute configuration commands, show commands, parse CLI output, call other scripts etc.
To enter the python environment on the Nexus NX-OS use the python command. Once in the python environment the hash (#) command prompt will be replaced by three greater-than signs (>>>). At this point we are able to directly execute python commands and scripts.
N5k-UP# python
Copyright (c) 2001-2012 Python Software Foundation; All Rights Reserved
N5k-UP# >>>
The integrated python in NX-OS supports both interactive and non-interactive modes. Python commands in interactive mode can be executed after switching to the python environment. The next interactive mode example illustrates how to print the old time classic in the programming world, “hello world” output, directly from the NX-OS python environment.
N5k-UP# python
Copyright (c) 2001-2012 Python Software Foundation; All Rights Reserved
N5k-UP# >>>print "hello world"
hello world
N5k-UP# >>> exit()
N5k-UP#
Note: The following commands can be used to exit the python environment and switch back to NX-OS privileged mode (#): quit(), exit (), Ctrl-C or Ctrl-D (i.e. EOF)
Pythonin NX-OS can run also in non-interactive (script) mode by running the Python script name as an argument to the Python CLI command.
For demonstration purposes we’ve created a simple python script named helloPython.py. This script has been created using a standard text editor, e.g. Notepad from the Windows OS, and has been uploaded to a TFTP server. The script has been downloaded to the Nexus switch and stored in the bootflash:scripts location which is where pythons scripts must be stored and executed. The content of our Python script is shown below:
N5k-UP# show file bootflash:scripts/helloPython.py
#!/usr/bin/env python
import sys
argvList = sys.argv[1:]
forargv in argvList:
print 'Hello ' + argv
Executing Python Scripts
The python script is executed using the source <filename> command followed by the necessary parameters the script is expecting. A variable (argv) is expected to be received as input to the script. This variable (firewall.cx) is printed along with the word “Hello” at the beginning of the output.
N5k-UP# source helloPython.py firewall.cx
Hello firewall.cx
NOTE: Before the NX-OS 7.0 version, python scripts are executed with the ‘python’ instead of the ‘source’ command.
Finally, you can create your own NX-OS commands by taking advantage of the python scripting. A new command named hello has been configured, using the cli alias command, which executes our Python script along with the necessary parameters:
N5k-UP(config)# cli alias name hello source helloPython.py
N5k-UP(config)# hello Vasilis
Hello Vasilis
The cli alias command above instructs the NX-OS to create a new command named hello which, when executed, will run in its turn the command “source helloPython.py” but also accept any parameters given (for our Python script). The cli alias command is covered extensively later in this article.
Nexus NX-OS Hints & Tips
Working with the Nexus NX-OS is a pleasant experience considering the similarities with the Linux operating system. Unix/Linux users will surely feel right at home. To further enhance user experience we’ve written the top 5 NX-OS handy commands section below that could be useful for the day to day operation and administration of Nexus switches. Let’s start the countdown...
Nexus NX-OS Tip No.5 – Executing Multiple Commands in One Line
The Nexus NX-OS allows the execution of multiple show or configuration commands in one go using the semi-colon ; character between them:
N5k-UP# show clock ; show checkpoint summary ; show hostname ;
12:56:57.370 UTC Mon May 15 2023
User Checkpoint Summary
--------------------------------------------------------------------------------
1) FIRST-Checkpoint:
Created by admin
Created at Wed, 16:13:19 10 May 2023
Size is 15,831 bytes
Description: None
2) SLA:
Created by admin
Created at Sun, 14:21:06 14 May 2023
Size is 16,183 bytes
Description: PYTHON-SCRIPT
N5k-UP
N5k-UP# configure terminal ; interface eth1/6 ; description *** test multiple commands *** ;
Enter configuration commands, one per line. End with CNTL/Z.
N5k-UP(config-if)# show run interface ethernet 1/6
!Command: show running-config interface Ethernet1/6
!Time: Mon May 15 12:58:46 2023
version 7.0(2)N1(1)
interface Ethernet1/6
description *** test multiple commands *** ;
Nexus NX-OS Tip No.4 – Tracking Recent User Configuration Changes
All commands executed within the Nexus NX-OS are logged by default. You can easily find who modified the configuration and when, as well as the exact commands that have been applied using the show accounting log command:
N5k-UP(config-if)# show accounting log | last 3
Mon May 15 13:05:12 2023:type=update:id=10.10.8.174@pts/2:user=admin:cmd=configure terminal ; interface Ethernet1/6 ; description test (REDIRECT))
Mon May 15 13:05:12 2023:type=update:id=10.10.8.174@pts/2:user=admin:cmd=configure terminal ; interface Ethernet1/6 ; description test (SUCCESS)
Mon May 15 13:05:16 2023:type=start:id=vsh.9446:user=admin:cmd=
The | last 3 parameter will display the last 3 entries.
Nexus NX-OS Tip No.3 – Creating Your Own NX-OS Alias Commands
Creating your own NX-OS alias commands is a great feature which helps simplify long and tedious commands. Cisco IOS users can also use the cli alias command to create IOS equivalent commands. For example we can create an alias copy running-config startup-config command and save it as wr to help other users with more experience on Cisco IOS devices work more easily around the Nexus switch.
Several useful examples are provided below:
N5k-UP(config)# cli alias name ipb show ip interface brief
N5k-UP(config)# cli alias name is show interface status
N5k-UP(config)# cli alias name hb show hsrp brief
N5k-UP(config)# cli alias name ps show port-channel summary
N5k-UP(config)# cli alias name wr copy running-config startup-config
N5k-UP(config)# wr
[########################################] 100%
Copy complete, now saving to disk (please wait)...
Nexus NX-OS Tip No.2 – Quickly Viewing and Executing Past Commands
The Nexus NX-OS allows users to easily view and recall past commands with the use of the show cli history command. When entered, the switch will list commands entered from the oldest to the most recent (indicated by the number on the left) along with the date/time executed. The switch will execute the selected command by using the exclamation mark (!) and the number of the command line.
In the example below we selected command No.9 from the history list by entering !9:
N5k-UP# show cli history
0 13:18:30 conf
<output omitted>
8 13:20:59 cli alias name id show interface description
9 13:21:04 show run | include alias
10 13:23:06 show cli alias
N5k-UP# !9
N5k-UP# show run | include alias
cli alias name sla source routetrack-1.3.py 8.8.8.8/32 management 10.10.8.176
cli alias name hello source helloPython.py
cli alias name ipb show ip interface brief
cli alias name is show interface status
cli alias name hb show hsrp brief
cli alias name ps show port-channel summary
cli alias name wr copy running-config startup-config
N5k-UP#
Nexus NX-OS Tip No.1 – Comparing Differences in Running & Startup Configuration
You can compare the output from a show command with the output from the previous snapshot of the same command. In particular, the Cisco NX-OS software creates temporary files for the most current output “show command” for all current and previous users’ sessions.
The “show run diff” command can be used to display the difference between running and startup configuration. The section starting with *** (stars) refers to the Startup-config while the section under --- (dashes) refers to the Running-config.
Note: The switch will not show any differences to the configuration after it is saved
N5k-UP# show run diff
*** Startup-config
--- Running-config
***************
*** 46,56 ****
interface Ethernet1/2
interface Ethernet1/3
interface Ethernet1/4
! description GREP2
interface Ethernet1/5
interface Ethernet1/6
description test
--- 45,55 ----
interface Ethernet1/2
interface Ethernet1/3
interface Ethernet1/4
! description *** TEST DIFF ***
interface Ethernet1/5
interface Ethernet1/6
N5k-UP# wr
[########################################] 100%
Copy complete, now saving to disk (please wait)...
N5k-UP# show run diff
N5k-UP#
The diff-clean command can be used to remove the temporary files for the current user's active session or for all past and present sessions for all users.
N5k-UP# diff-clean all-sessions
N5k-UP#
Summary
The Cisco NX-OS Software is a data center-class operating system with powerful scripting capabilities. This article showed how to make use of various Nexus NX-OS command options and operators, how to combine multiple Nexus commands, filter Show commands output, create and execute NX-OS scripts, introduced Python scripting and environment and covered a number of Nexus NX-OS hints and tips to help administrators and engineers make their day-to-day operation and administration of the Nexus Data Center switches faster, easier and safer!
Free eBook - Endpoint Security

Enterprise-Class Cloud & Network Monitoring

Bandwidth Monitor

Wi-Fi Key Generator
Network and Server Monitoring

Follow Firewall.cx
Recommended Downloads
Cisco Password Crack
Decrypt Cisco Type-7 Passwords on the fly!
Automated Patching Solution

Firewall Analyzer