


What is Server Virtualization?
Server virtualization is the process of apportioning a physical server into several smaller virtual servers. During server virtualization, the resources of the server itself remain hidden. In fact, the resources are masked from users, and software is used for dividing the physical server into multiple virtual machines or environments, called virtual or private servers.
This technology is commonly used in Web servers. Virtual Web servers provide a very simple and popular way of offering low-cost web hosting services. Instead of using a separate computer for each server, dozens of virtual servers can co-exist on the same computer.
There are many benefits of server virtualization. For example, it allows each virtual server to run its own operating system. Each virtual server can be independently rebooted without disturbing the others. Because several servers run on the same hardware, less hardware is required for server virtualization, which saves a lot of money for the business. Since the process utilizes resources to the fullest, it saves on operational costs. Using a lower number of physical servers also reduces hardware maintenance.
In most cases, the customer does not observe any performance deficit and each web site behaves as if it is being served by a dedicated server. However, the resources of the computer being shared, if a large number of virtual servers reside on the same computer, or if one of the virtual servers starts to hog the resources, Web pages will be delivered more slowly.
There are several ways of creating virtual servers, with the most common being virtual machines, operating system-level virtualization, and paravirtual machines.
How Are Virtual Servers Helpful
The way Internet is exploding with information, it is playing an increasingly important role in our lives. Internet traffic is increasing dramatically, and has been growing at an annual rate of nearly 100%. The workload on the servers is simultaneously increasing significantly so that servers frequently become overloaded for short durations, especially for popular web sites.
To overcome the overloading problem of the servers, there are two solutions. You could have a single server solution, such as upgrading the server to a higher performance server. However, as requests increase, it will soon be overloaded, so that it has to be upgraded repeatedly. The upgrading process is complex and the cost is high.
The other is the multiple server solution, such as building a scalable network service system on a cluster of servers. As load increases, you can just add a new server or several new servers into the cluster to meet the increasing requests, and a virtual server running on commodity hardware offers the lowest cost to performance ratio. Therefore, for network services, the virtual server is a highly scalable and more cost-effective for building server cluster system.
Virtual Servers with Linux
Highly available server solutions are done by clustering. Cluster computing involves three distinct branches, of which two are addressed by RHEL or Red Hat Enterprise Linux:
Ø Load balancing clusters using Linux Virtual Servers as specialized routing machines to dispatch traffic to a pool of servers.
Ø Highly available or HA Clustering with Red Hat Cluster Manager that uses multiple machines to add an extra level of reliability for a group of services.
Load Balancing Cluster System Using RHEL Virtual Servers
When you access a website or a database application, you do not know if you are accessing a single server or a group of servers. To you, the Linux Virtual Server or LVS cluster appears as a single server. In reality, there is a cluster of two or more servers behind a pair or redundant LVS routers. These routers distribute the client requests evenly throughout the cluster system.
Administrators use Red Hat Enterprise Linux and commodity hardware to address availability requirements, and to create consistent and continuous access to all hosted services.
In its simplest form, an LVS cluster consists of two layers. In the first layer are two similarly configured cluster members, which are Linux machines. One of these machines is the LVS router and is configured to direct the requests from the internet to the servers. The LVS router balances the load on the real servers, which form the second layer. The real servers provide the critical services to the end-user. The second Linux machine acts as a monitor to the active router and assumes its role in the event of a failure.
The active router directs traffic from the internet to the real servers by making use of Network Address Translation or NAT. The real servers are connected to a dedicated network segment transfer all public traffic via the active LVS router. The outside world sees this entire cluster arrangement as a single entity.
LVS with NAT Routing
The active LVS router has two Network Interface Cards or NICs. One of the NICs is connected to the Internet and has a real IP address on the eth0 and a floating IP address aliased to eth0:1. The other NIC connects to the private network with a real IP address on the eth1, and a floating address aliased to eth1:1.
All the servers of the cluster are located on the private network and use the floating IP for the NAT router. They communicate with the active LVS router via the floating IP as their default route. This ensures their abilities for responding to requests from the inernet are not impaired.
When requests are received by the active LVS router, it routes the request to an appropriate server. The real server processes the request and returns the packets to the LVS router. Using NAT, the LVS router then replaces the address of the real server in the packets with the public IP address of the LVS router. This process is called IP Masquerading, and it hides the IP addresses of the real servers from the requesting clients.
Configuring LVS Routers with the Piranha Configuration Tool
The configuration file for an LVS cluster follows strict formatting rules. To prevent server failures because of syntax errors in the file lvs.cf, using the Piranha Configuration Tool is highly recommended. This tool provides a structured approach to creating the necessary configuration file for a Piranha cluster. The configuration file is located at /etc/sysconfig/ha/lvs.cf, and the configuration can be done with a web-based tool such as the Apache HTTP Server.
As an example, we will use the following settings:
LVS Router 2: eth0: 192.168.26.202
Real Server 1: eth0: 192.168.26.211
Real Server 2: eth0: 192.168.26.212
VIP: 192.168.26.200
Gateway: 192.168.26.1
You will need to install piranha and ipvsadm packages on the LVS Routers:
# yum install piranha
Start services on the LVS Routers with:
# chkconfig piranha-gui on
# chkconfig httpd on
Set a Password for the Piranha Configuration Tool using the following commands:
# piranha-passwd
Next, turn on Packet Forwarding on the LVS Routers with:
Starting the Piranha Configuration Tool Service
First you'll need to modify the mode SELinux in permissive mode with the use of the command:
# service httpd start
# service piranha-gui start
If this is not done, the system will most probably show the following error massage when the piranha-gui service is started:
(13)Permission denied: make_sock: could not bind to address 0.0.0.0:3636
No listening sockets available, shutting down
Unable to open logs
Configure the LVS Routers with the Piranha Configuration Tool
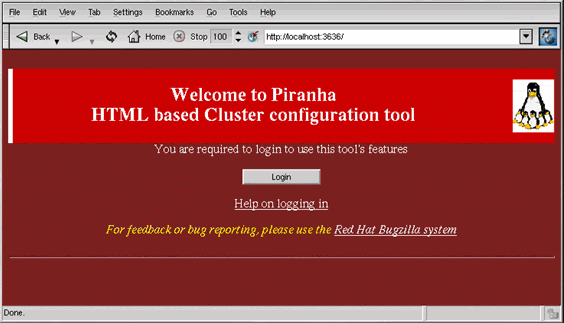
The Piranha Configuration Tool runs on port 3636 by default. Open http://localhost:3626 or http://192.168.26.201:3636 in a Web browser to access the Piranha Configuration Tool. Click on the Login button and enter piranha for the Username and the administrative password you created, in the Password field:
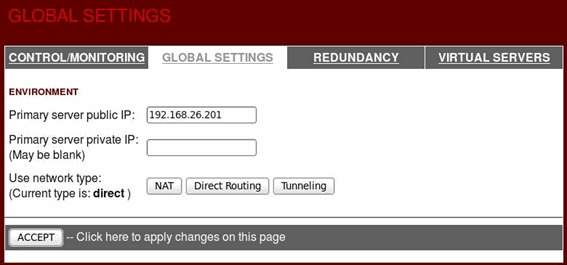
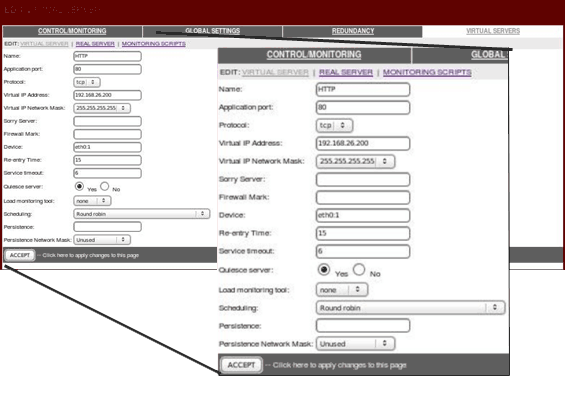
Click on the GLOBAL SETTINGS panel, enter the primary server public IP, and click the ACCEPT button:
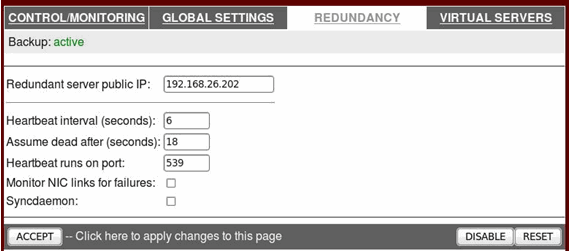
Click on the REDUNDANCY panel, enter the redundant server public IP, and click the ACCEPT button:
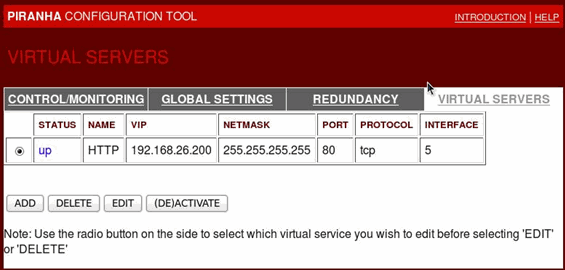
Click on the VIRTUAL SERVERS panel, add a server, edit it, and activate it:
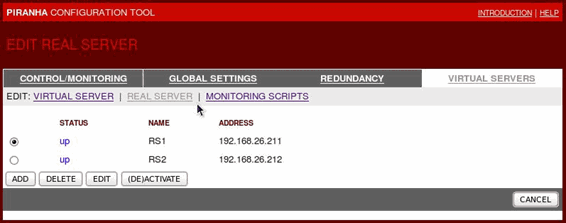
Clicking on the REAL SERVER subsection link at the top of the panel displays the EDIT REAL SERVER subsection. Click the ADD button to add new servers, edit them and activate them:
Copy the lvs.cf file to another LVS router:
Start the pulse services on the LVS Routers with the following command:
Testing the System
You can use the Apache HTTP server benchmarking tool (ab) to simulate a visit by the user.
HA Clustering With Red Hat Cluster Manager
When dealing with clusters, single point failures, unresponsive applications and nodes are some of the issues that increase the non-availability of the servers. Red Hat addresses these issues through their High Availability or HA Add-On servers. Centralised configurations and management are some of the best features of the Conga application of RHEL.
For delivering an extremely mature, high-performing, secure and lightweight high-availability server solution, RHEL implements the Totem Single Ring Ordering and Membership Protocol. Corosync is the cluster executive within the HA Add-On.
Kernel-based Virtual Machine Technology
RHEL uses the Linux kernel that has the virtualization characteristics built-in and makes use of the kernel-based virtual machine technology known as KVM. This makes RHEL perfectly suitable to run as either a host or a guest in any Enterprise Linux deployment. As a result, all Red Hat Enterprise Linux system management and security tools and certifications are part of the kernel and always available to the administrators, out of the box.
RHEL uses highly improved SCSI-3 PR reservations-based fencing. Fencing is the process for removing resources from the cluster node from being accessed when they have lost contact with the cluster. This prevents uncoordinated modification of shared storage thus protecting the resources.
Improvement in system flexibility and configuration is possible because RHEL allows manual specification of devices and keys for reservation and registration. Ordinarily, after fencing, the unconnected cluster mode would need to be rebooted to rejoin the cluster. RHEL unfencing makes it possible to re-enable access and startup of the node without administrative intervention.
Improved Cluster Configuration
LDAP, the Lightweight Directory Access Protocol provides improved cluster configuration system for load options. This provides better manageability and usability across the cluster by easily configuring, validating and synchronizing the reload. Virtualized KVM guests can be run as managed services.
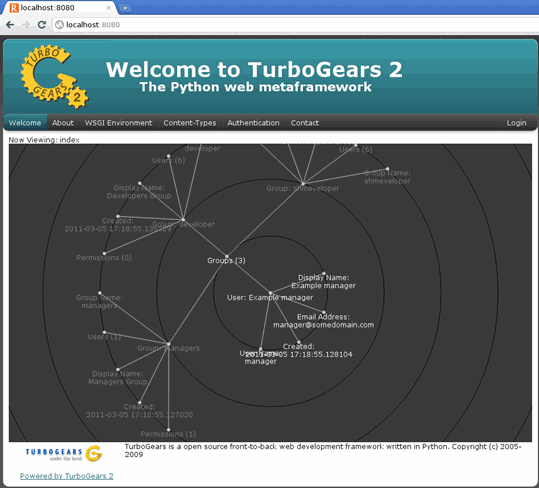
RHEL Web interface to the cluster management and administration runs on TurboGears2 and provides a rich graphical user interface. This enables unified logging and debugging by administrators who can enable, capture and read cluster system logs using a single cluster configuration command.
Installing TurboGears2
The method of installing TurboGears2 depends on the platform and the level of experience. It is recommended to install TurboGears2 withing a virtual enviroment as this will prevent interference with the system's installed packages. Prerequisites for installation of TurboGears2 are Python, Setuptools, Database and Drivers, Virtualenv, Virtualenvwrapper and other dependencies.
Your IP address:
216.73.216.176
All-in-one protection for Microsoft 365

FREE Hyper-V & VMware Backup

Wi-Fi Key Generator
Network and Server Monitoring

Follow Firewall.cx
Recommended Downloads
Enterprise Class Cloud & Network Monitoring

Cisco Password Crack
Decrypt Cisco Type-7 Passwords on the fly!
Bandwidth Monitor

Free PatchManager

Security Podcast

Firewall Analyzer
