


This article shows how to connect Cisco's Unified CallManager with a CallManager Express system (including UC520, UC540 and UC560) via H323 gateway, allowing the two systems to route calls between each other. This scenario is typically used between remote offices running CallManager Express that need to connect to their Headquarters running on CallManager.
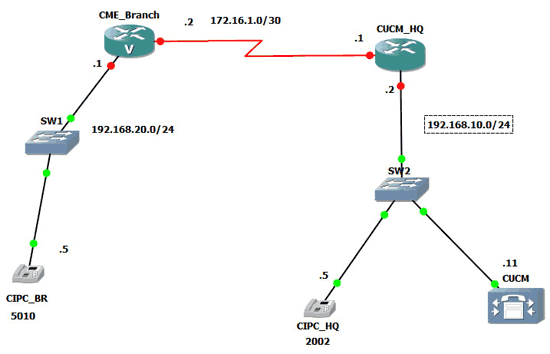
Our example network assumes there is a direct connection between the two CallManager systems via leased line as shown in the diagram below:
Engineers who wish to establish a VPN connection instead (via Internet) can refer to the following popular VPN articles:
The above network diagram was designed using GNS3 in a simulated environment consisting of two CallManager clusters, one at the Headquarters (CUCM) with an IP Communicator client (CIPC_HQ) assigned with extension 2002 and at the remote branch we have a CallManager Express system with an IP Communicator client (CIPC_BR) with extension 5010.
To simplify things, our CME router is directly connected with the Headquarters router (CUCM_HQ), providing a path for us to reach the main CallManager (192.168.10.11).
While CallManager (Headquarters) requires a voice gateway to make and receive calls on the PSTN/ISDN network (Telco Providers), it is not a requirement for intra-site communication.
We assume no configuration exists on the CME router and basic configuration on CallManager.
Configuring CallManager Express or UC500 Series System
Following is the CallManager Express router configuration covering its LAN and WAN configuration:
The h323-gateway voip interface and h323-gateway voip bind srcaddr commands define the source interface and IP address for all h323 protocol communications and is necessary to ensure VoIP communication with CUCM.
Next, we enable the CallManager Express service and configure our single IP phone (IP Communicator) that will be used for our test:
The CallManager Express service is enabled via the telephony-service and the important ip source-address subcommand, which defines the source IP address of the CallManager Express system. In case the CME router has multiple interfaces connected to various networks (VLANs), we set the source IP address to be that of the Voice VLAN, so the CME router will use the correct interface (and therefore source IP address) to communicate with its clients (IP phones).
With the above configuration complete, the IP Communicator phone should register on CME and receive its extension. Keep in mind that it is necessary to configure the TFTP Server IP address to that of the CME under the Preferences > Network settings in IP Communicator.
Finally, all that is left is to configure a dial-peer that would direct all calls to CallManager at our Headquarters. This is done by using dial-peers as shown below:
destination-pattern 2...
session target ipv4:192.168.10.11
This dial-peer instructs CallManager Express to forward any calls made to any four digit number starting with 2, e.g. 2000, 2452, 2900 etc, to IP address 192.168.10.11, our headquarters CallManager.
Dial-peers are an essential ingredient to managing outgoing and incoming calls and will be covered in greater depth in another article.
This completes our CallManager Express configuration. We are now ready to move on to our CallManager configuration
Configuring CallManager (CUCM)
Configuring CallManager involves a number of easy-to-follow steps as outlined below. As shown in the network map, we've assigned extension number 2002 to the IP Communicator connected to the system. This phone will be accepting incoming calls from the remote CallManager Express system.
First step is to check that the Cisco CallManager and Cisco TFTP Server are activated. This can be done by visiting Cisco Unified Serviceability > Tools > Service Activation as shown below:
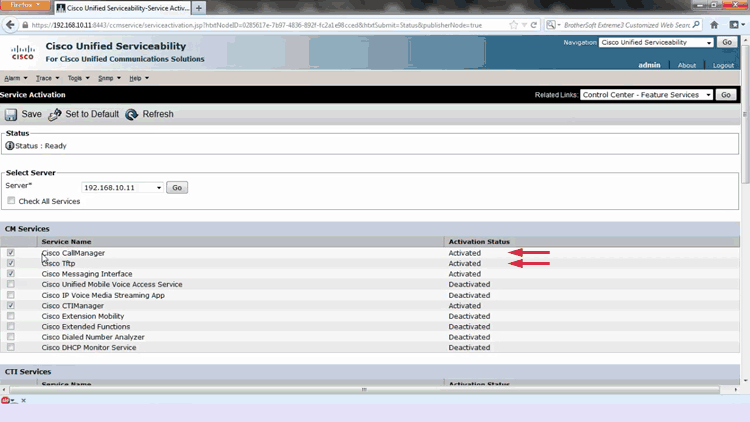
Here we will need to enable the mentioned CM Services by selecting them and clicking on Save.
If IP Communicator is not already connected and registered to CallManager, we can automate this process by going to Cisco Unified CM Administrator > System > Cisco Unified CM Configuration:
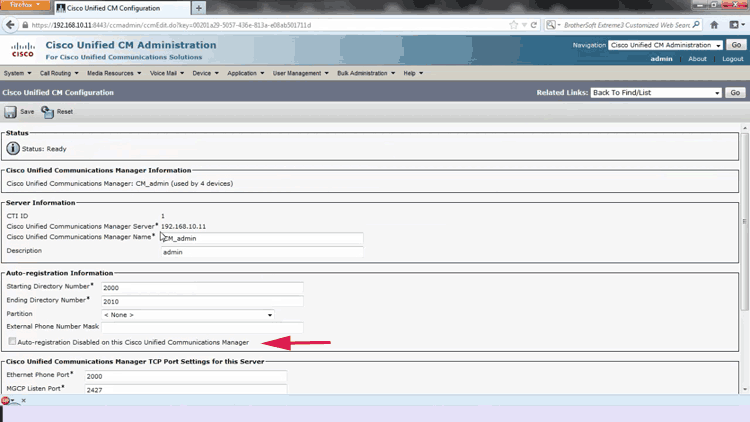
Here, uncheck the box Auto-registration Disabled on this Cisco Unified Communications Manager. This will allow any IP phone (CIPC - IP Communicator in our case) to register and automatically assign them an extension. This is a very easy and painless method to register IP phones on a CallManager system.
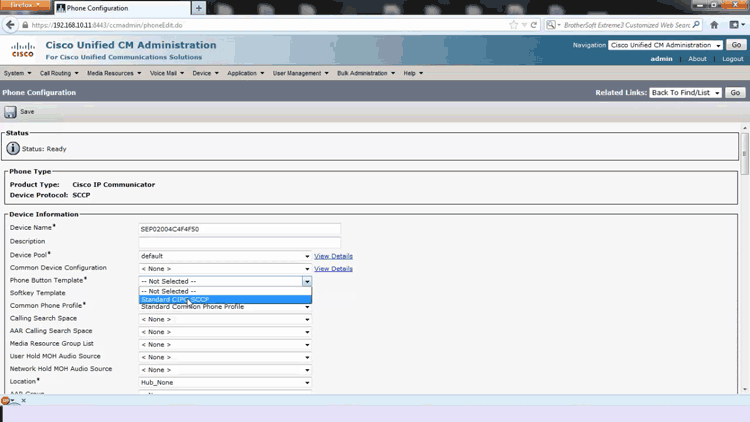
Now to configure CIPC with extension 2002, we go to Device > Phones > Add New> Phone Type and select Cisco IP Communicator.
Next, go to Device Name (Select the MAC address of CIPC), and for the field Softkey Template select Standard CIPC SCCP:
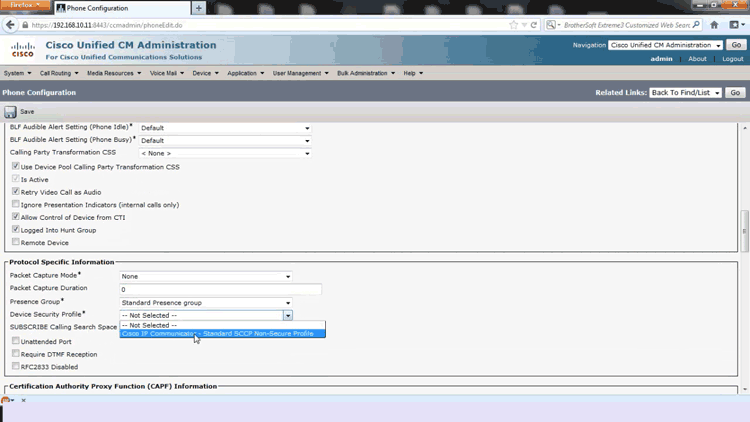
Scrolling down the page, you'll come across the SUBSCRIBE Calling Search Space field. Click on it and select Cisco IP Communicator:
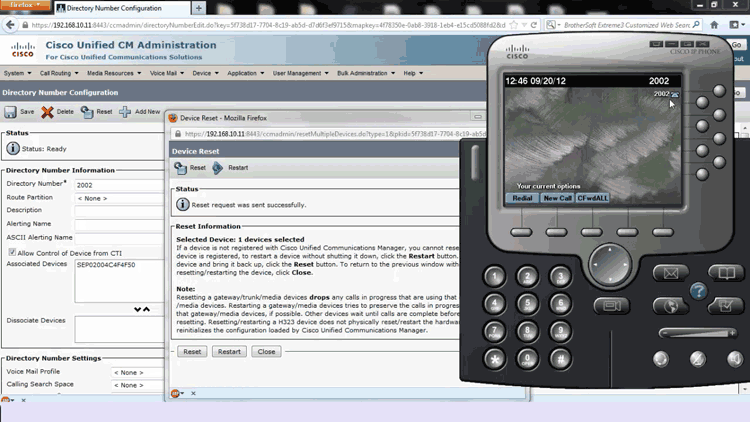
Click on save then choose Directory Number Configuration, enter 2002 or desired extension then reset the phone to allow the successfuly registration of CIPC with CallManager:
Setting Up H.323 Gateway on CallManager
With the IP phone registered we now need to setup the H.323 gateway.
Setting up an H.323 gateway in CallManager is a straightforward process. From the main menu, select: Device > Gateways > Add New > Gateway Type and select H.323 Gateway.
When selecting the H.323 Gateway, we need to provide a bit more information until it is usable by the system.
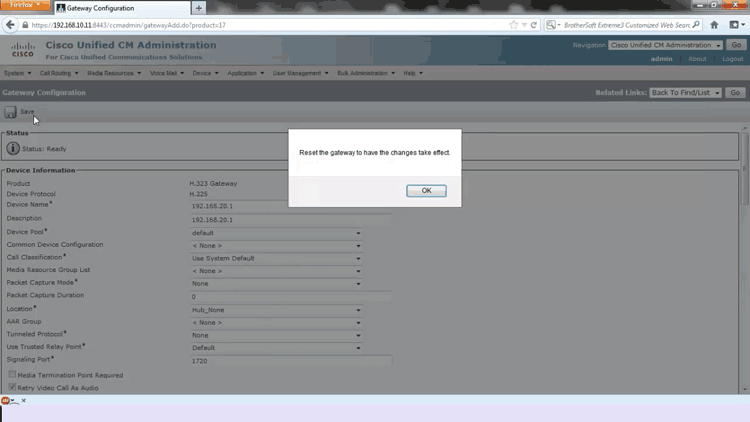
In the field Device Name and Description, enter the IP address of the remote CME system, 192.168.20.1.
Next, click on the Device Pool field and select Default. Finally cick on Save and Reset to have the changes take effect:
Configuring CallManager Route Group, Route List & Route Pattern
Our next step is to configure a Route Group, Route List and finally Route Pattern. This is a similar process to CME's dial-peer confguration but it's slightly more complicated in CallManager.
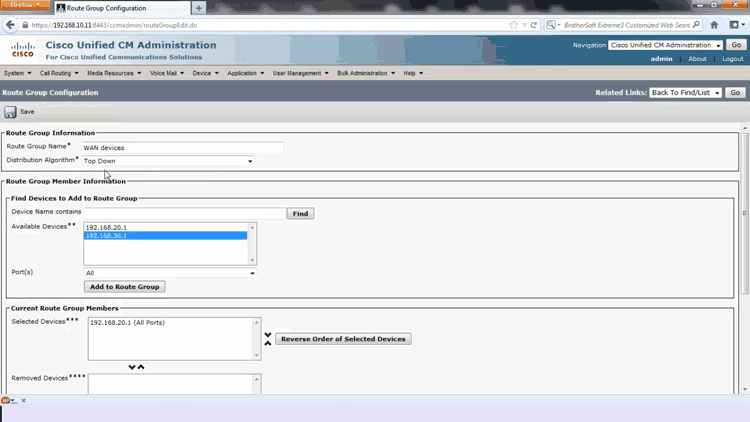
From the main menu, go to Call Routing > Route/Hunt > Route Group > Add New > Add Available Device and select the newly created H.323 Gateway. Click on Add To Route Group then click on save.
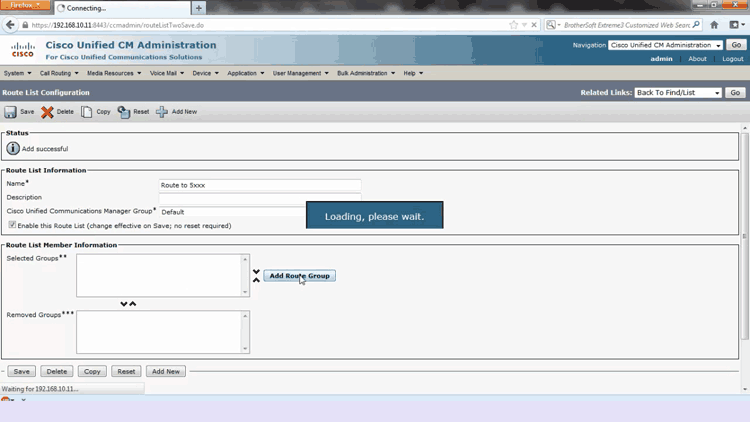
Now we go to Call Routing > Route/Hunt > Route List > Add New > Name, we used Route to 5xxx to help distinguish this route list. In the Cisco Unified Communication Manager Group drop-down option select Default then click on Save.
Right below we see the Route List Member Information section. Here we click on the Add Route Group button:
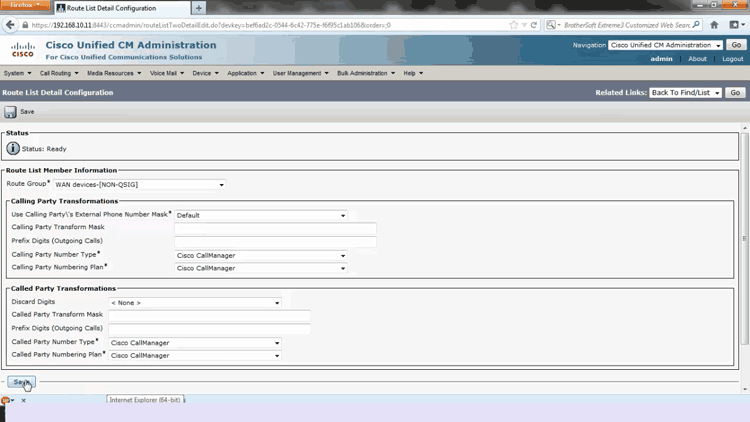
At the new screen select the Route Group field and choose WAN Devices-[NON-QSIG], then click on Save:
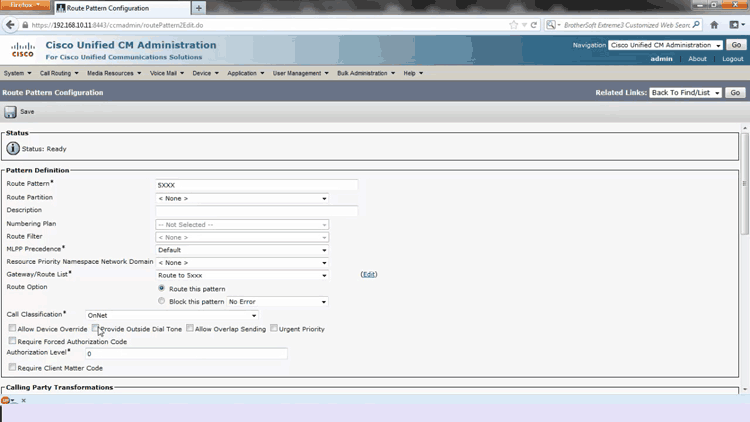
Finally we configure the Route Pattern. Go to Call Routing > Route/Hunt > Route Pattern > Add New > Route Pattern and enter 5XXX. The pattern "5XXX" is similar to CallManager Express's "2..." and will match any four digit number starting with 5.
Below, at the Gateway/Route List, select Route to 5xxx and uncheck Provide Outside Dial Tone. Finally, click on Save:
At this point CallManager has been configured to route all 5xxx extensions to the remote CallManager Express system and both systems should be able to communicate with each other.
About The Author
Mohammad Saeed is a guest writer on Firewall.cx, freelancer and Video trainer, who loves working with Cisco techologies. As a CCNA & CCNP certified engineer, Mohammad works with small and medium size networking projects and helps students and network engineers to understand Cisco topics.
Free eBook - Endpoint Security

Enterprise-Class Cloud & Network Monitoring

Bandwidth Monitor

Wi-Fi Key Generator
Network and Server Monitoring

Follow Firewall.cx
Recommended Downloads
Cisco Password Crack
Decrypt Cisco Type-7 Passwords on the fly!
Automated Patching Solution

Firewall Analyzer
